如何基于64位Windows服务器快速搭建LDAP服务?
1、下载64位安装文件openldap-for-windows.msi,一路next就可以,中间可以修改调整安装路径。比如安装到C:\OpenLDAP下
2、修改安装路径下的配置文件C:\OpenLDAP\slapd.conf。
首先修改 include 部分。
原来:
include ./schema/core.schema
include ./schema/cosine.schema
include ./schema/nis.schema
include ./schema/inetorgperson.schema
include ./schema/openldap.schema
include ./schema/dyngroup.schema
修改后:
include ./schema/core.schema
include ./schema/cosine.schema
include ./schema/inetorgperson.schema
include ./schema/corba.schema
include ./schema/dyngroup.schema
include ./schema/nis.schema
include ./schema/openldap.schema
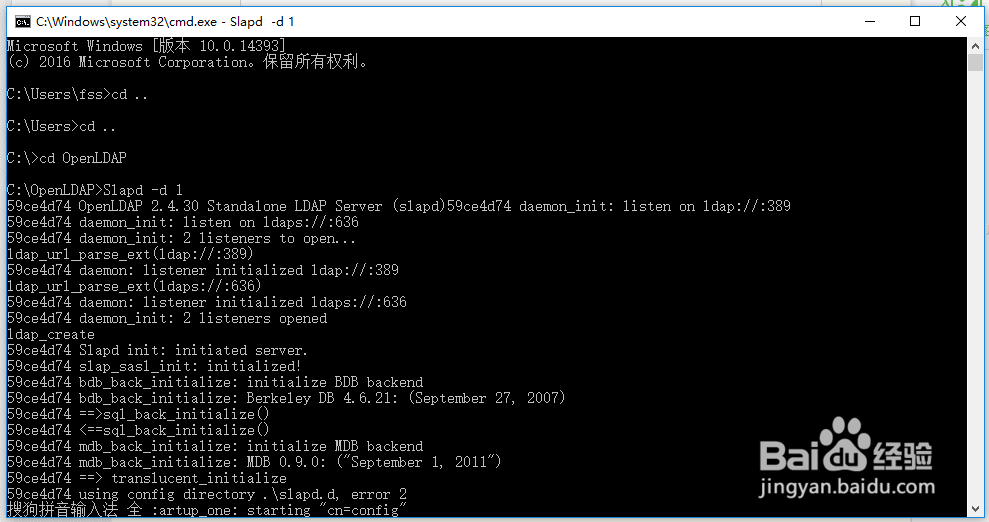
3、启动LDAD服务器。
Cmd 到 安装路径下 c:/OpenLDAP,执行命令
Slapd –d 1
启动完毕。
LDAP启动会默认加载C:\OpenLDAP\maxcrc.ldif 文件 。

4、下面导入自己的数据。
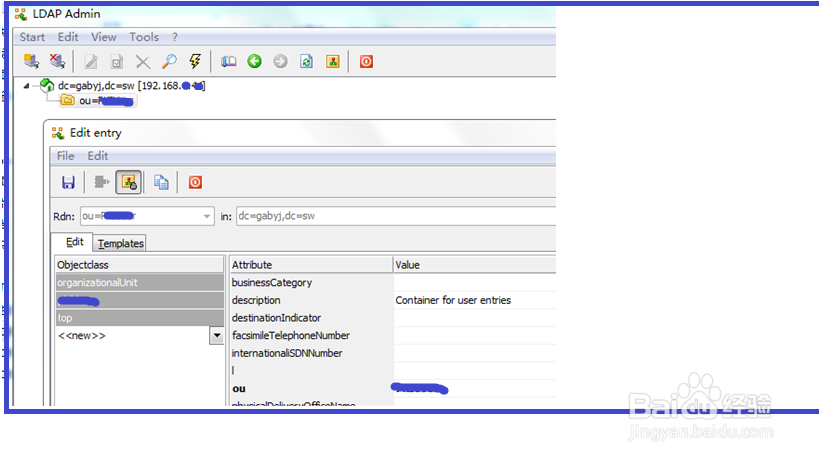
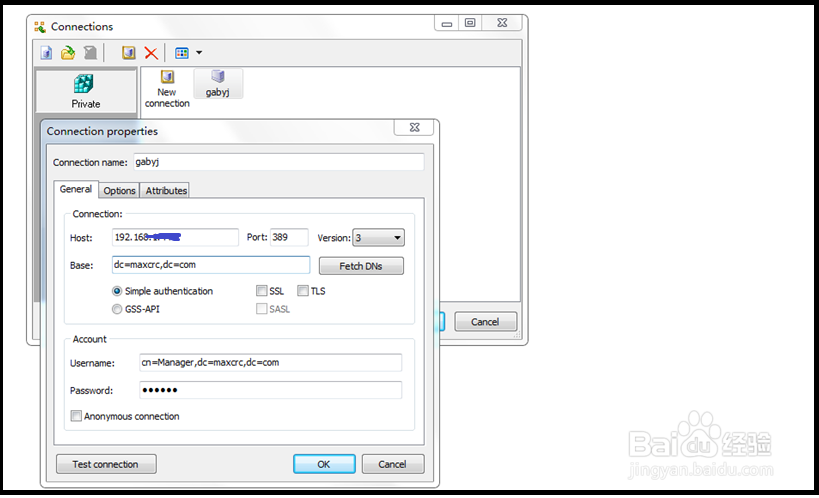
(1)打开LdapAdmin.exe ,连接服务器,删掉安装时候默认的 dn. 打开LdapAdmin.exe(下载LdapAdminExe-w64-1.7.2.zip,解压安装管理客户端软件)
不要 匿名登录。要使用管理员 用户 及密码登录,才有修改及删除数据的权限。
(2)停止LADP服务器,直接关掉cmd窗口即可。准备导入自己定义的dn。
(3)删掉C:\OpenLDAP\data,原来启动时候加载的默认数据。
5、修改配置文件中自己的域名。再次修改安装路径下的配置文件C:\OpenLDAP\slapd.conf下面部分:
改前:
suffix "dc=maxcrc,dc=com"
rootdn "cn=Manager,dc=maxcrc,dc=com"
改后:
suffix "dc=gabyj,dc=sw"
rootdn "cn=Manager, dc=gabyj,dc=sw "
( 注:suffix、rootdn修改为自己的域名前缀,跟导入的自己数据文件的.idif根节点对应)
6、放入自己的schema文件。(相当于oracle数据库的表结构)到路径C:\OpenLDAP\schema,比如C:\OpenLDAP\schema\ gabyj.schema。因为自己自定义的文件会使用自己的schema。
7、放入自己的*idif数据文件,比如C:\OpenLDAP\gabyj.idif。
LDAP启动会默认加载C:\OpenLDAP\maxcrc.ldif 文件 。
C:\OpenLDAP\maxcrc.ldif 文件如下:
dn: dc=maxcrc,dc=com
objectClass: domain
objectClass: top
dc: maxcrc
dn: ou=People,dc=maxcrc,dc=com
objectclass: top
objectclass: organizationalUnit
ou: People
description: Container for user entries
导入命令,执行导入:
slapadd -v -l gabyj.idif。(导入自己的自定义数据,无需启动服务)
C:\OpenLDAP\gabyj.idif为自己的自定义文件,此处略,只要符合.idif数据格式规范,就能够导入服务器。
8、打开LdapAdmin.exe管理客户端,查看和管理自己的数据。可对数据进行查询、编辑、导出、删除等操作。
如果您需要通过Java连接操作LDAP数据库,可以下载Java连接LDAP服务器的api进行操作即可。